MFA activation from a user's perspective
After enforcing MFA for Cracky, a new window will appear after his next successful login, telling him that his organization needs more information to protect his account, as shown in Figure 1.1:

Figure 1.1 – New message at the first login after enforcing MFA
Cracky now only has two options: Use a different account to log in or click Next to proceed through the MFA activation process. With that being said, you should inform your users before activating MFA to let them know what's going to happen and to reduce the number of support tickets required!
Let's look at what happens if Cracky decides to complete the process:
1. Cracky decides to proceed, so he clicks the Next button.
2. On the following screen, Cracky is asked to download the Microsoft Authenticator app to his smartphone. Once finished, he clicks Next.

Figure 1.2 – Downloading the Microsoft Authenticator app
3. The next screen gives Cracky a short intro into what's coming, and he presses Next again.
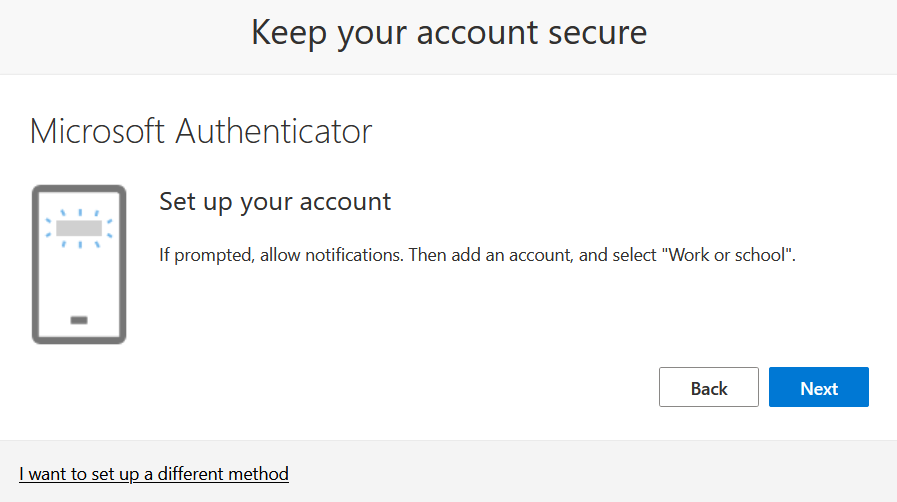
Figure 1.3 – Keep your account secure
4. Cracky is asked to use his authenticator app to scan the QR code. This will set up his account in the Microsoft Authenticator app on his phone.

Figure 1.4 – Scanning the QR code to set up the account in the Microsoft Authenticator app
5. After the account has been set up in the app, clicking on the Next button will trigger an MFA challenge in the app. Cracky approves the login attempt and the account has been set up successfully.

Figure 1.5 – Notification has successfully been approved
Now that you know how to configure MFA from an administrator's and a user's perspective, let's move one step further and take a look at security defaults in Azure AD.
Thant Zin Phyo@Cracky (MCT, MCE, MVP)
Comments
Post a Comment